Spray Foam 101 Guide
DIY vs. Professional Spray Foam Installation
DIY kits can handle small, defined jobs. Whole-home work depends on commercial equipment and trained technicians. Here is how to tell which situation you are in.
What a DIY Spray Foam Kit Actually Is
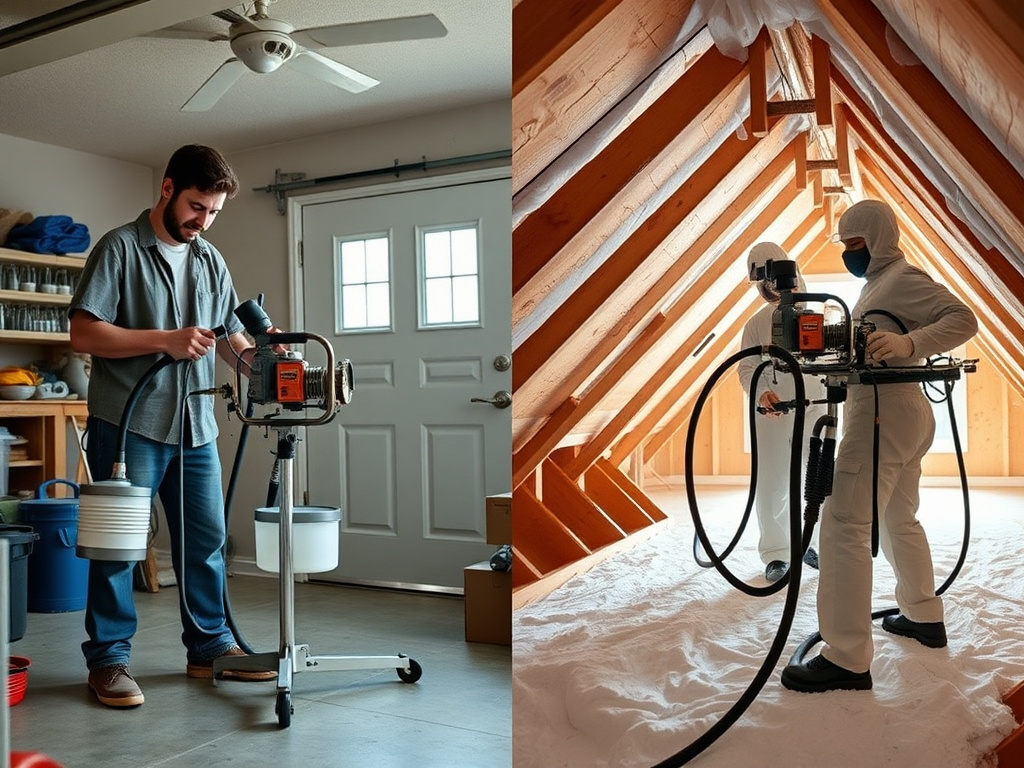
DIY spray foam kits are small, self-contained two-tank systems — one tank holds the "A" side (isocyanate) and the other holds the "B" side (resin blend), connected through a disposable mixing nozzle that combines the two chemicals as they spray. They are low-pressure systems compared to professional equipment, designed to be operated by one person with basic personal protective equipment and no specialized training or licensing. Kits are typically sized by board footage, commonly ranging from a couple hundred to a couple thousand board feet per kit, with tank sets sold in different sizes depending on job scope.
These kits use the same basic two-component polyurethane chemistry as professional spray foam, and most produce closed-cell foam, though open-cell DIY kits exist as well. The chemistry reacts and cures the same way it does in professional applications — it just gets there through smaller tanks, a simpler spray gun, and lower application pressure than a commercial rig delivers.
What DIY Kits Handle Well
DIY kits are a reasonable fit for small, bounded jobs: sealing gaps around a foundation sill plate, filling a handful of rim joist bays, insulating a small crawlspace, patching a spot where batt insulation was removed or damaged, or spraying around a few penetrations like pipe and wire chases. These are jobs where the total foam volume is modest, the area is easy to reach with the kit's hose length, and a somewhat less polished finish than a professional job is not a major problem.
Because the kits are inexpensive relative to hiring a crew, they can make sense for homeowners doing incremental air-sealing work over time, tackling one specific trouble spot, or supplementing existing insulation in a small, defined area rather than undertaking a whole-house insulation upgrade.
Where DIY Kits Fall Short
Full attic rooflines, whole exterior wall assemblies, and large crawlspaces are generally outside what a DIY kit is built for. These jobs need continuous, even application across a large surface area at a consistent thickness, which is exactly what commercial high-pressure proportioning rigs and heated hoses are designed to deliver. DIY kits run at lower pressure and often lose heat and pressure consistency as the tanks empty, which makes maintaining even thickness across a large area difficult.
Running out of material partway through a large job is a common DIY failure point — foam sprayed in one session with fresh tanks does not always match foam sprayed later from a second kit, leaving visible seams, gaps, or thickness variation. Professional rigs draw from much larger supply drums and maintain consistent pressure and temperature throughout a job of any size, which is part of why they are used for whole-house work.
The Skill and Equipment Gap
Spray foam chemistry is unforgiving of mistakes. The two components have to combine at close to a 1:1 ratio for the foam to cure properly — an off-ratio mix can leave foam soft, sticky, shrinking, or slow to cure, any of which can extend off-gassing well past the normal reoccupancy window. Professional installers monitor tank temperature, pressure, and ratio continuously with equipment calibrated for the job, and adjust for ambient temperature and humidity, which affect how the chemicals react.
Spray technique also matters more than it might seem. Foam sprayed too thick in a single pass can scorch internally from the heat of its own reaction, which not only wastes material but can create combustion risk in more severe cases. Professional applicators are trained to spray in the correct lift thickness per pass and let each layer cure appropriately before adding more, a discipline that is easy to get wrong with a handheld DIY gun and no experience judging foam behavior in real time.
Cost Comparison
For small jobs, DIY kits are usually the cheaper option upfront — a kit covering a few hundred board feet costs a fraction of what it would cost to book a professional crew and truck for a small trip. That gap narrows or disappears on larger jobs, since DIY kit cost per board foot does not scale down the way professional bulk material pricing does, and multiple kits are needed to cover a whole attic or set of walls.
The real cost comparison also has to account for risk. A failed or uneven DIY application may need professional correction later, which can cost more than simply hiring a professional for the full job from the start. Removal of poorly applied foam is more labor-intensive than fresh installation, so a DIY mistake on a large area can end up costing more than doing it right the first time would have.
Liability and Warranty Considerations
Professional installers are typically a licensed, bonded business and often warranty both the material and the workmanship for a period of years. If foam is applied incorrectly by a licensed contractor and causes a problem — soft foam, off-gassing complaints, gaps in the applied area — there is a business on the other end of that warranty responsible for fixing it.
DIY kit manufacturers warranty the product itself (the chemical components meeting spec), not the outcome of a homeowner's application. There is no workmanship warranty on a DIY job, so mistakes in mixing, thickness, or technique are the homeowner's to live with or pay to correct. This is a meaningful difference for larger or higher-stakes areas of the house, like rooflines or whole wall assemblies, where a failure is expensive to fix.
When DIY Makes Sense vs. When to Call a Pro
DIY spray foam tends to make sense when the job is small and well-defined — a handful of rim joist bays, a crawlspace under 200 to 300 square feet, sealing specific known gaps or penetrations — and when the homeowner is comfortable following the manufacturer's mixing, ventilation, and reoccupancy instructions exactly. It also fits situations where an imperfect finish in a low-visibility area is an acceptable tradeoff for lower cost.
Calling a professional makes more sense for full attic rooflines, whole-wall new-construction spraying, large crawlspace or basement encapsulation, any area with structural or moisture complications, and any job where the cost of a mistake — off-gassing, an uneven application, wasted material, or having to remove and redo the work — outweighs the savings of doing it yourself. As a rule of thumb, the larger and more continuous the surface area, the more the balance tips toward professional equipment and training.
- DIY-friendly: small rim joist sections, single-room crawlspaces, isolated gap sealing
- Pro territory: full attic rooflines, whole exterior walls, large crawlspace or basement jobs
- Key risk factors: off-ratio mixing, uneven thickness, no workmanship warranty on DIY work
A Practical Way to Decide
One useful exercise before buying a kit is to measure the actual square footage or board footage of the intended project and compare it honestly against what the kit is rated to cover. Manufacturers publish yield figures based on a specific application thickness, and the real-world area a kit can treat often runs lower once gaps, waste, and learning-curve mistakes are factored in on a first-time DIY attempt. If the math is close or the project spans more than one or two kits, that is often a sign the job has grown past what a DIY approach handles comfortably.
It also helps to think about how forgiving the space is of an imperfect result. A rim joist bay that ends up slightly uneven is rarely a big deal. A roofline or a full wall assembly that ends up uneven can mean real energy loss and a harder, more expensive fix later. Weighing the size of the job against the cost of getting it wrong is a more useful framework than simply comparing sticker price between a kit and a professional quote.
Frequently Asked Questions
It is not realistic in most cases. Insulating a whole attic requires large volumes of foam sprayed evenly and at controlled thickness, which is what commercial high-pressure rigs and trained technicians are built for. DIY kits are sized and pressured for small, targeted jobs.
For small jobs, yes, often significantly. For larger jobs, DIY becomes less of a bargain once you account for kit cost per board foot, the risk of a failed application that has to be redone, and the fact that large-area jobs are outside what these kits are designed to do.
Yes. The chemistry is the same, so an incorrect mix ratio can leave foam soft, shrinking, or slow to cure regardless of whether a DIY kit or a professional rig was used. Mix accuracy matters just as much with a small kit as with commercial equipment.
No. Kit manufacturers typically warranty the product itself, not the installation outcome. There is no workmanship warranty the way there is with a professional installer, so application errors are the homeowner's responsibility to live with or fix.
Uneven thickness and off-ratio mixing are the most common issues, both of which can extend off-gassing time or leave the foam underperforming. On larger surfaces, running out of material mid-job and creating visible seams or gaps is also a common problem.
More Guides
Spray Foam Insulation Cost Guide
Realistic 2026 price ranges for open-cell and closed-cell spray foam, what drives cost up or down, and how to spot a lowball quote.
Read the guideSpray Foam Safety & Off-Gassing
What off-gassing actually is, realistic re-entry times, why installer PPE matters, and how cured spray foam compares to other insulation materials on safety.
Read the guideChoosing a Spray Foam Contractor
What to check before hiring — certification, quality control, warranty terms, and the red flags that separate a solid contractor from a risky one.
Read the guideReady to see what spray foam costs for your project?
Tell us about your space and get connected with a vetted local installer for a free, no-obligation quote.